If the Show Progress option in the Switches... dialog is turned on, a progress window is displayed momentarily at the top of the screen indicating the progress of the transmission.

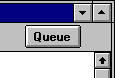
To accomplish the first step for any outgoing current message, select Queue For Delivery from the Message menu. Alternatively the rightmost button appearing in the icon bar at the top of the current message window is la beled Queue. Click this button to queue the current message for later delivery.
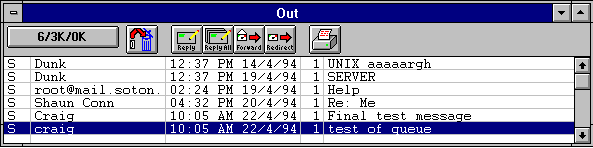
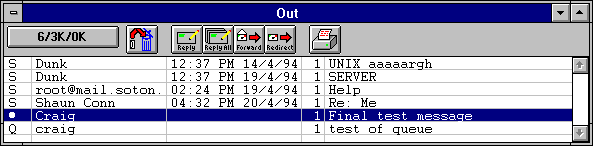
Either of these selections closes the message window (if it was open), saves the message in the Out mailbox and marks it as queued, meanin g ready to be delivered. Queued messages are marked by a Q in the far left-hand column of the Out mailbox.
For the second step, select Send Queued Messages from the File menu. This sends the queued messa ge (or messages). If the Show Progress option in the Switches... dialog is turned on, a progress window is displayed momentarily at the top of the screen indicating the progress of the transmission.
If you choose Right Now, the message is sent immediately upon clicking the OK button. If you choose Next time queued messages are sent, the message is sent the next time queued messages are sent. If you choose On or After, you can use the time and date fields to fill in the time when the message should be sent. The message is saved in the Out mailbox with a Q in the status column, just as if it were a normal queued message. However, the message is not actually sent until the specified time arrives.
Note: For the message to be sent at the correct time, Eudora must be running when the message is due to be sent. If Eudora is not running, the message is sent the first time Eudora is run after th e selected time has passed.
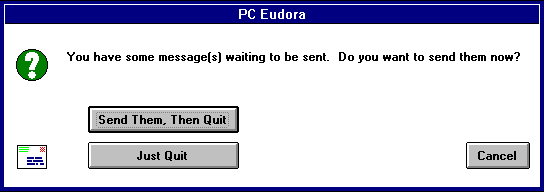
If you quit with timed messages, and the messages are due to be sent within the next 12 hours, Eudora warns you and gives you the opportunity to send them.

Note: You can also send a message immediately or change it to timed send using the Change Queuing... comma
nd.Changing the Status of a Queued Message
A message that is que
ued but as yet unsent may be unqueued using the Change Queuing... command. Open the Out mailbox and select the desired message summary. Then, select Change Queueing... from the Message menu and click on Don't Send. This chan
ges the message status from Queued (Q) to Saved (o). The message is held in the Out mailbox until it is either deleted or re-queued and sent.Keeping Copies of Outgoing Messages
Once a message is sent, it is put into the Trash mailbox unless the Keep Copies option in the Switches... dialog is turned on or the Keep Copy icon in the icon bar is on. I
n these cases, the message is left in the Out mailbox and is annotated with an S in the far left column of the Out mailbox indicating that the message has been sent.